Google Map api v3 マップ上のパスに沿ったアニメーションを実装する方法
どうもこんにちは。Toshikuraです。今回のTipsは【Google Map api v3 マップ上のパスに沿ったアニメーションを実装する方法】です。これはgoogle map上でA地点、B地点というように場所を決め、そのAB間で特定のシンボルをアニメーションさせる方法です。これまで何回かに分けてGoogle Map api v3の記事を書いてきましたが、今回で一段落かと思います。
はじめに
まずはgoogleMapの基本的な記述です。ここにパスやシンボル、アニメーションの記述を追加していきます。
<html>
<head>
	<title></title>
</head>
<body>
	<script type="text/javascript" src="http://maps.google.com/maps/api/js?sensor=false"></script>
	<script type="text/javascript">
	function initialize() {
	//基本的な記述
		var mapOptions = {
			center: new google.maps.LatLng(35.690496, 139.683565),
			zoom: 18,
			mapTypeId: google.maps.MapTypeId.ROAD
		};
		var map = new google.maps.Map(document.getElementById('map'),mapOptions);
	}
	google.maps.event.addDomListener(window, 'load', initialize);
	</script>
	<div id="map" style="width:100%; height: 300px;"></div>
</body>
</html>
実装方法
実装サンプルは以下のようになります。主に追加されたのは「パスの設定」「動作するシンボルの種類や大きさの設定」「パスの太さや色等の設定」の3つの記述です。動きの確認用のデモがありますので、良ければご確認下さい。
<script type="text/javascript" src="http://maps.google.com/maps/api/js?sensor=false"></script>
<script type="text/javascript"> var line;
function initialize() {
//基本的な設定
var mapOptions = {
center: new google.maps.LatLng(35.690496, 139.683565),
zoom: 18,
mapTypeId: google.maps.MapTypeId.ROAD
};
var map = new google.maps.Map(document.getElementById('map'),mapOptions);
//パスの設定
var lineCoordinates = [
new google.maps.LatLng(35.690976, 139.68207),
new google.maps.LatLng(35.690825,139.681951),
new google.maps.LatLng(35.690316,139.682552),
new google.maps.LatLng(35.690474,139.68278),
new google.maps.LatLng(35.690496,139.683565),
new google.maps.LatLng(35.690595,139.683732),
new google.maps.LatLng(35.690728,139.683848),
new google.maps.LatLng(35.690528,139.684344),
new google.maps.LatLng(35.690236,139.685159),
new google.maps.LatLng(35.690043,139.684738),
new google.maps.LatLng(35.69008,139.684711)
];
//動作するシンボルの種類や大きさの設定
var lineSymbol = {
path: google.maps.SymbolPath.FORWARD_OPEN_ARROW,
scale: 3,
strokeColor: '#19283c'
};
//パスの太さや色等の設定
line = new google.maps.Polyline({
path: lineCoordinates,
strokeColor: "#b21d2d",
strokeWeight: 3,
icons: [{
icon: lineSymbol,
offset: '100%'
}],
map: map
});
//アニメーション開始
animateCircle();
}
//アニメーション
function animateCircle() {
var count = 0;
setInterval(function() {
count = (count + 1) % 300;
var icons = line.get('icons');
icons[0].offset = (count / 3) + '%';
line.set('icons', icons);
}, 20);
}
google.maps.event.addDomListener(window, 'load', initialize);
</script>
パスの設定
パスの設定では、描写される線画の情報を記述します。LatLng(緯度,経度)という記述形式で、これを追加してゆく事で複雑な形状になります。
動作するシンボルの種類や大きさの設定
ここではシンボルの色や形状、大きさ、角度等の設定ができます。用意されているシンボルは以下の四種類です。またSVGパス表記をすることで任意のベクターアイコンにも設定可能です。詳しくはGoogle Maps Javascript API V3 Referenceをご確認ください。
| google.maps.SymbolPath.形状の種類 | イメージ |
| CIRCLE |  |
| BACKWARD_CLOSED_ARROW |  |
| FORWARD_CLOSED_ARROW |  |
| BACKWARD_OPEN_ARROW | 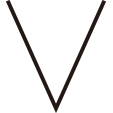 |
| FORWARD_OPEN_ARROW |  |
パスの太さや色等の設定
ここではパスの太さや線の色、塗りの色等を設定します。他にもクリックの可不可等の設定もできますので、詳しくはGoogle Maps Javascript API V3 Reference (PolygonOptions)をご参照ください。
以上になります。